Posted in cheesecake, Sweet
Well, Shavuos is just around the corner, and I thought that it’d be nice to be able to practice our cheesecake recipes, in order to try your hand and know which one to make at holiday time.
For the moment, there is already the coconut-lime cheesecake (click on the link for the recipe 😉 )
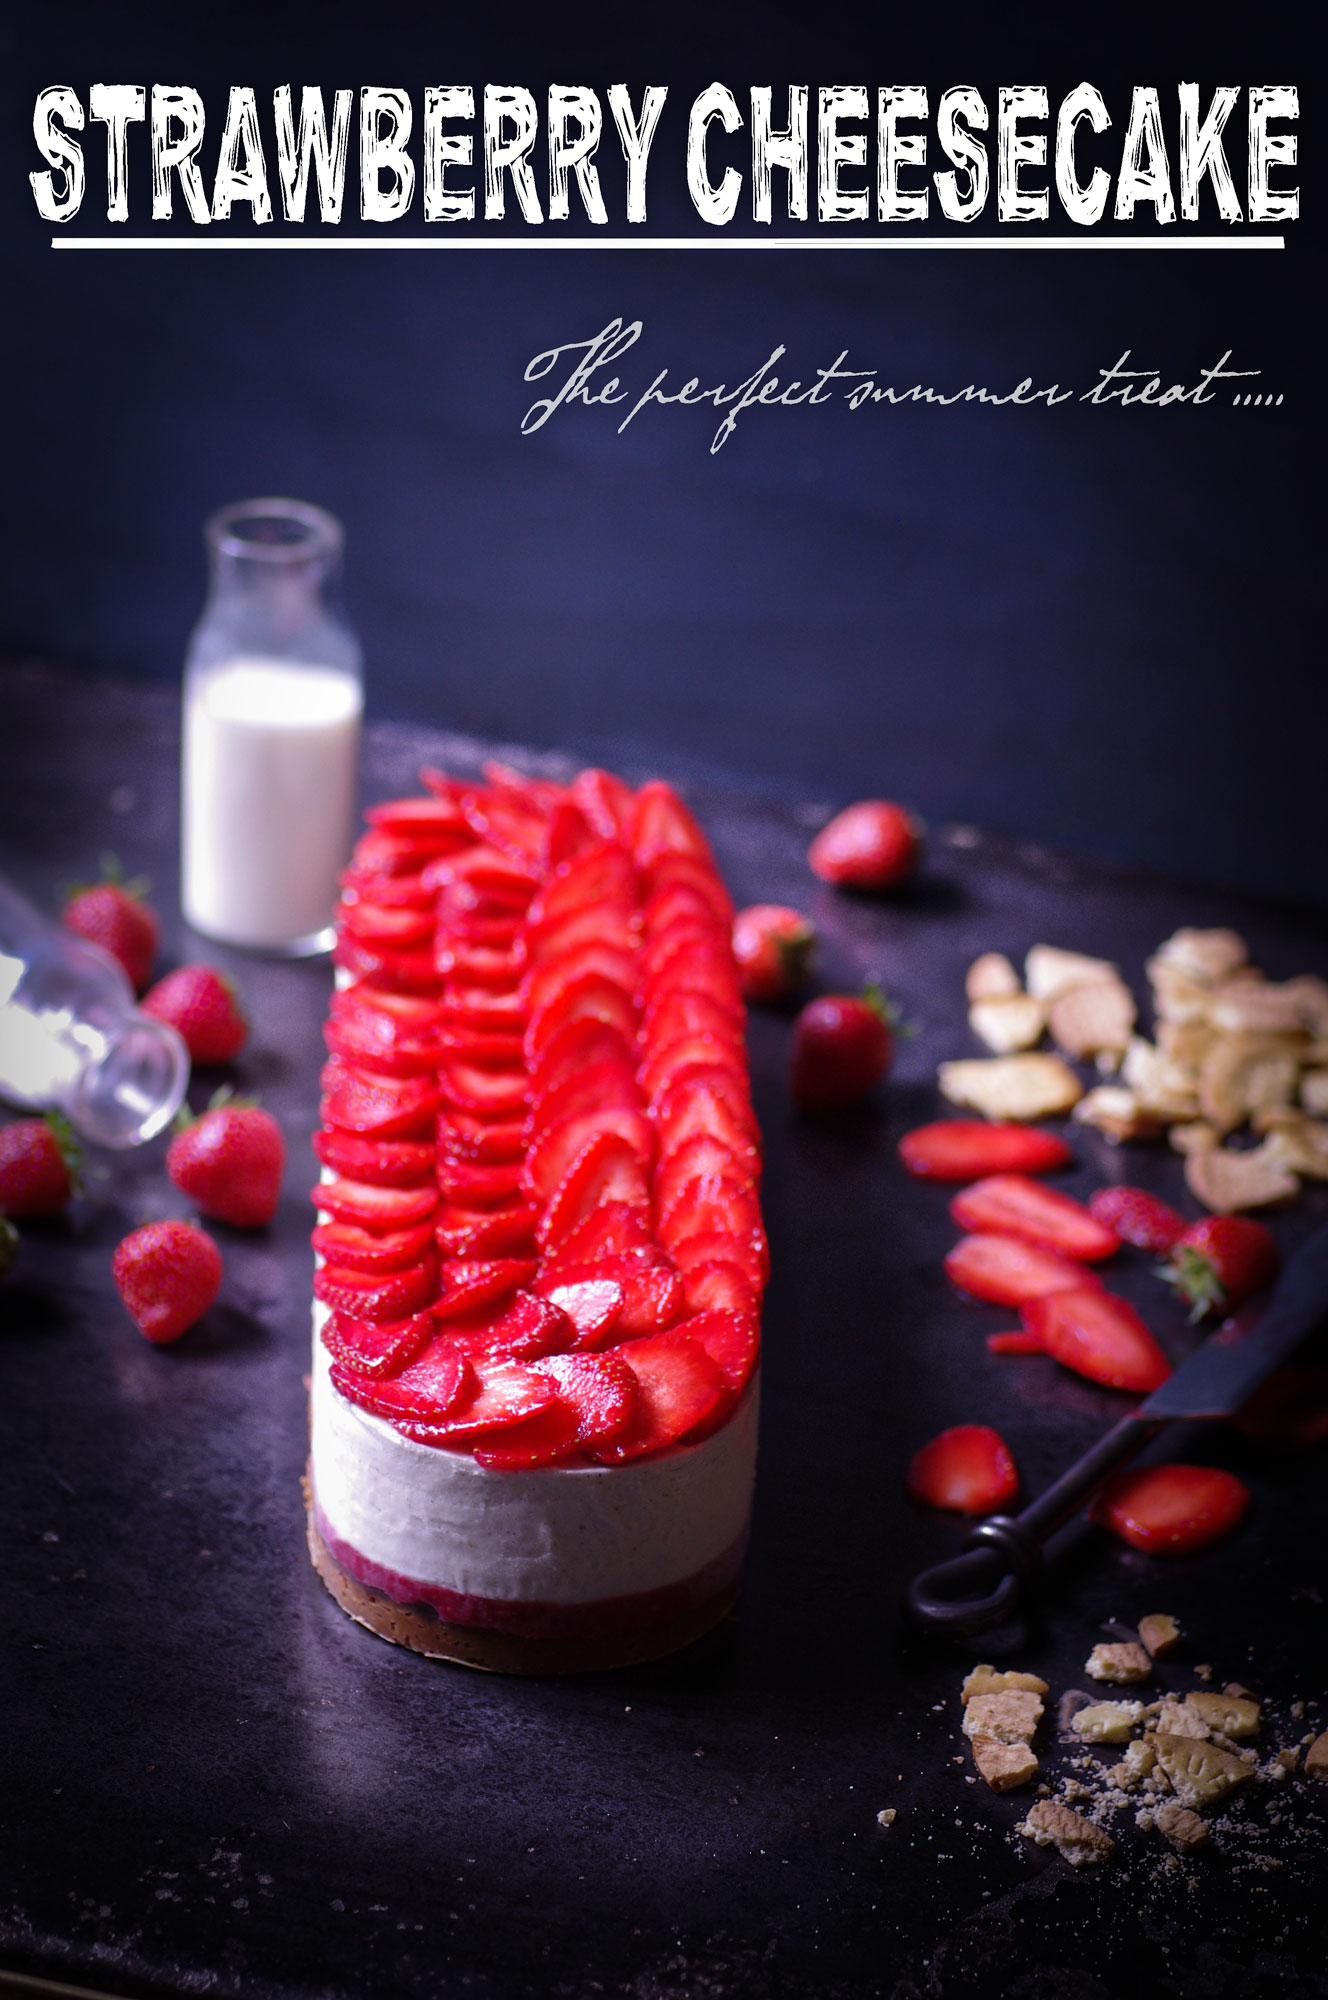
But today, I give you a completely different one, since it’s no-bake!
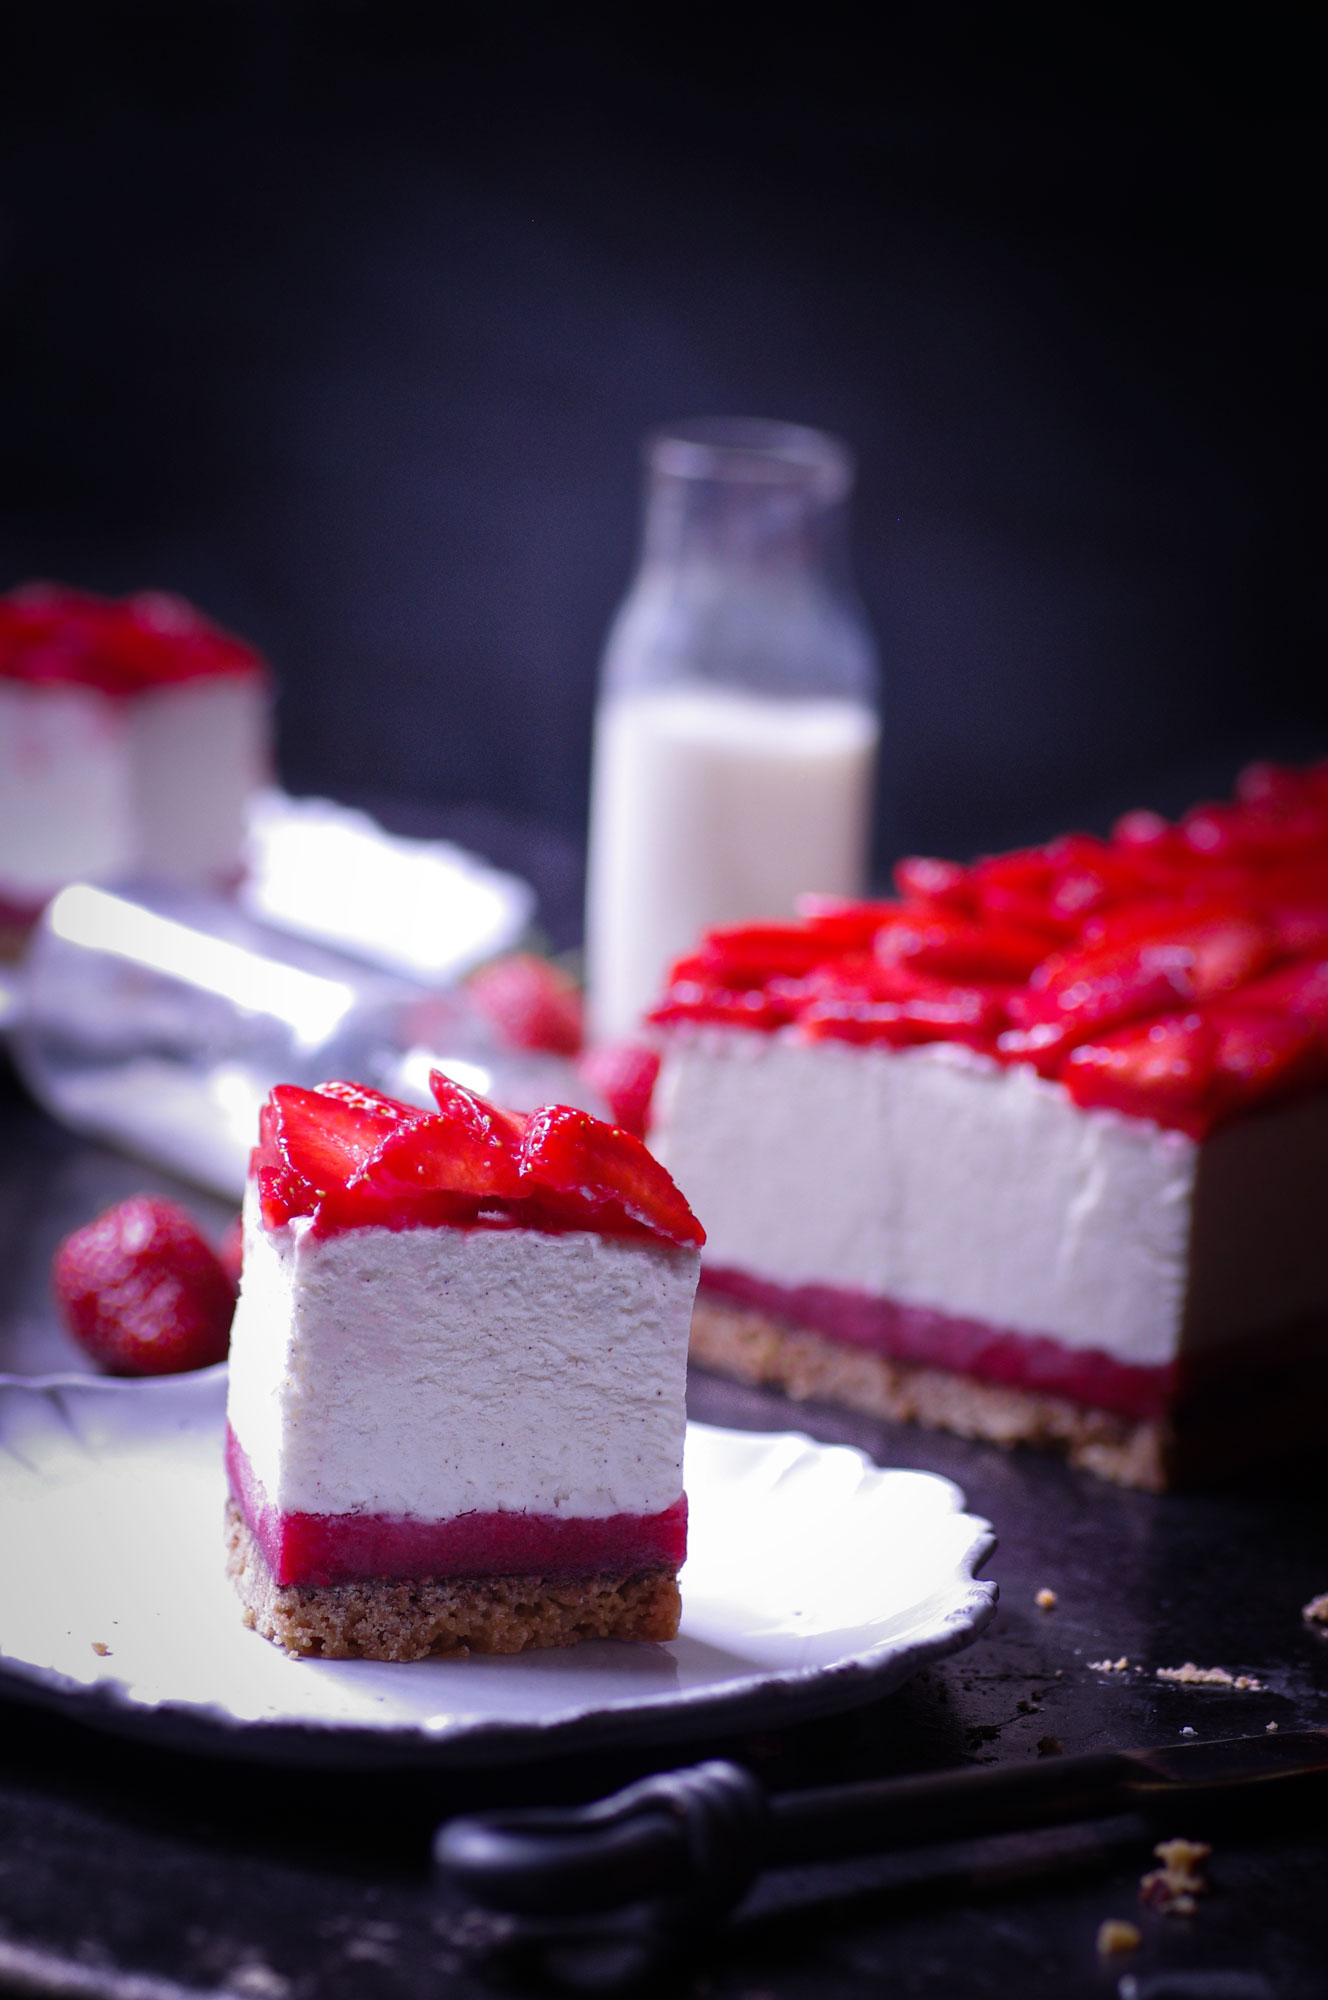
In this cake the fresh cheese is mixed with white cheese and whipped cream, for more creaminess and lightness.
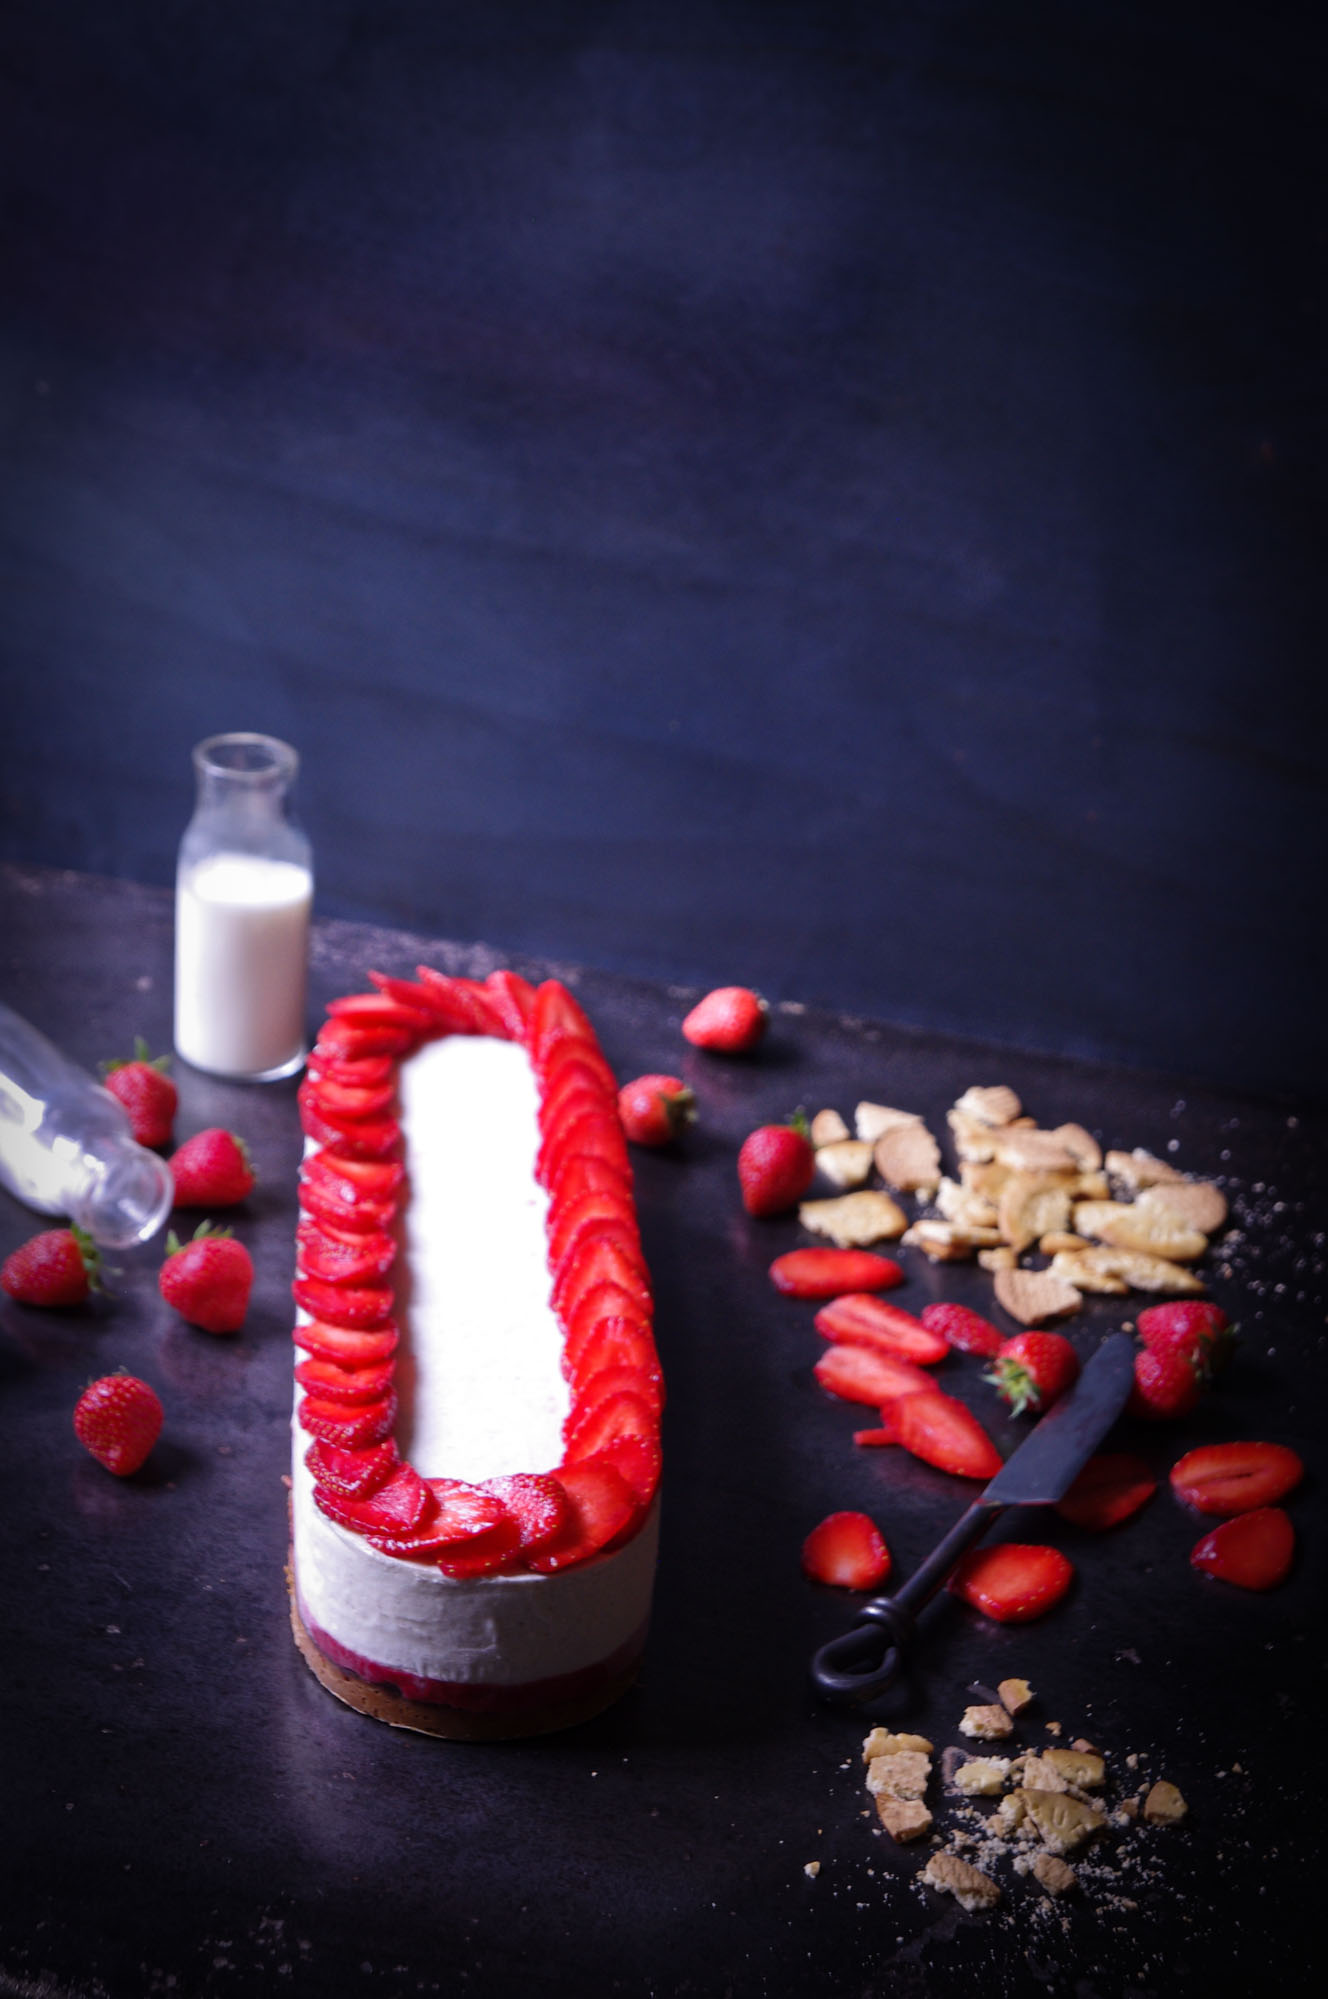
And the whole thing is held together with gelatin so the mixture sticks after unmolding (nobody likes to see cakes fall, right? ;))
So, no problem of baking, nor of cracked cakes, nor anything else…
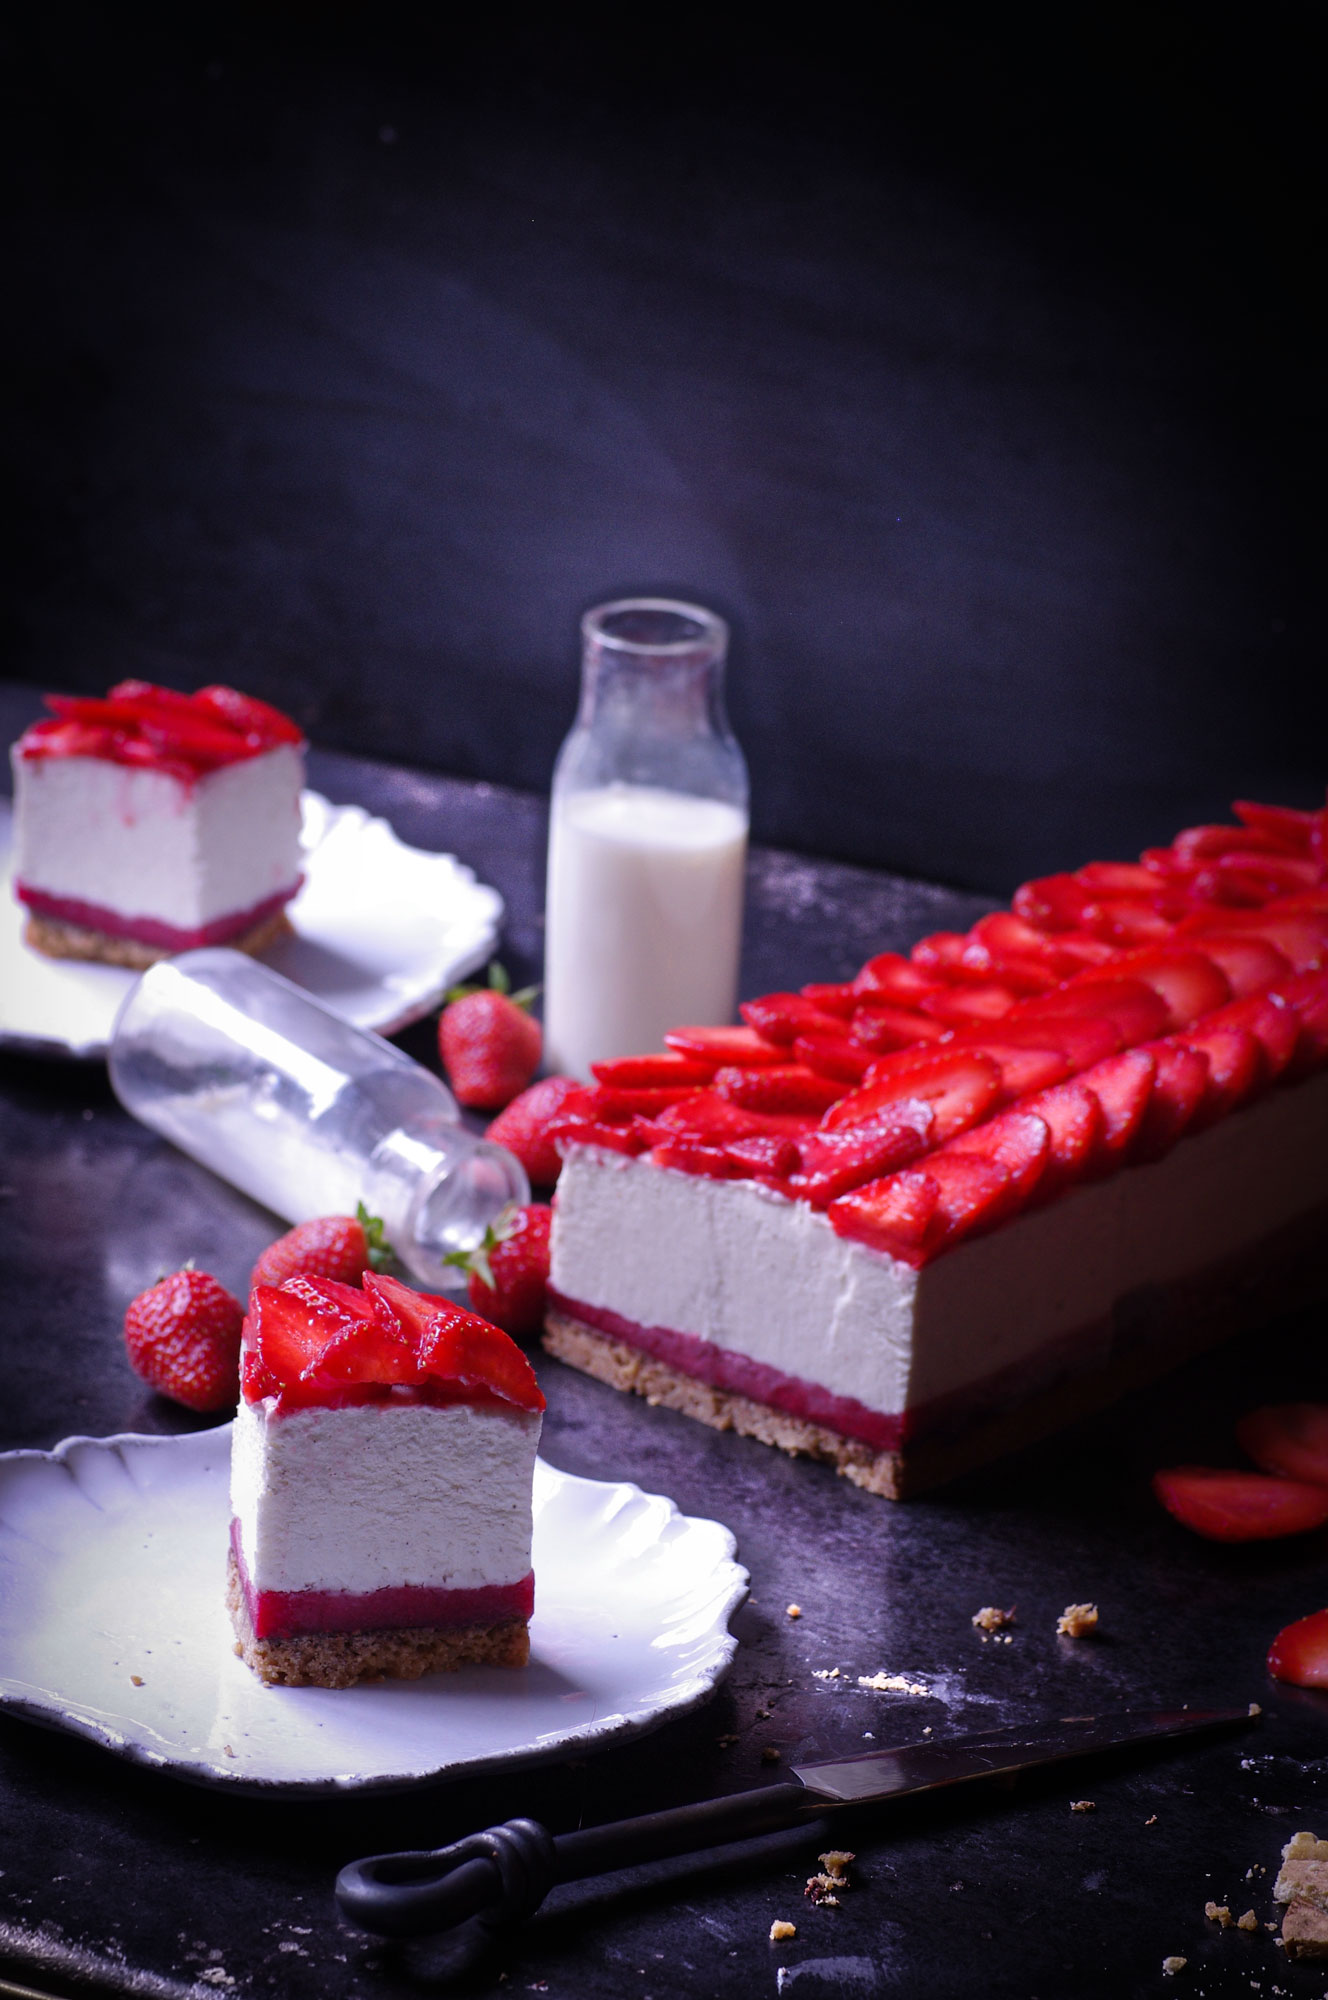
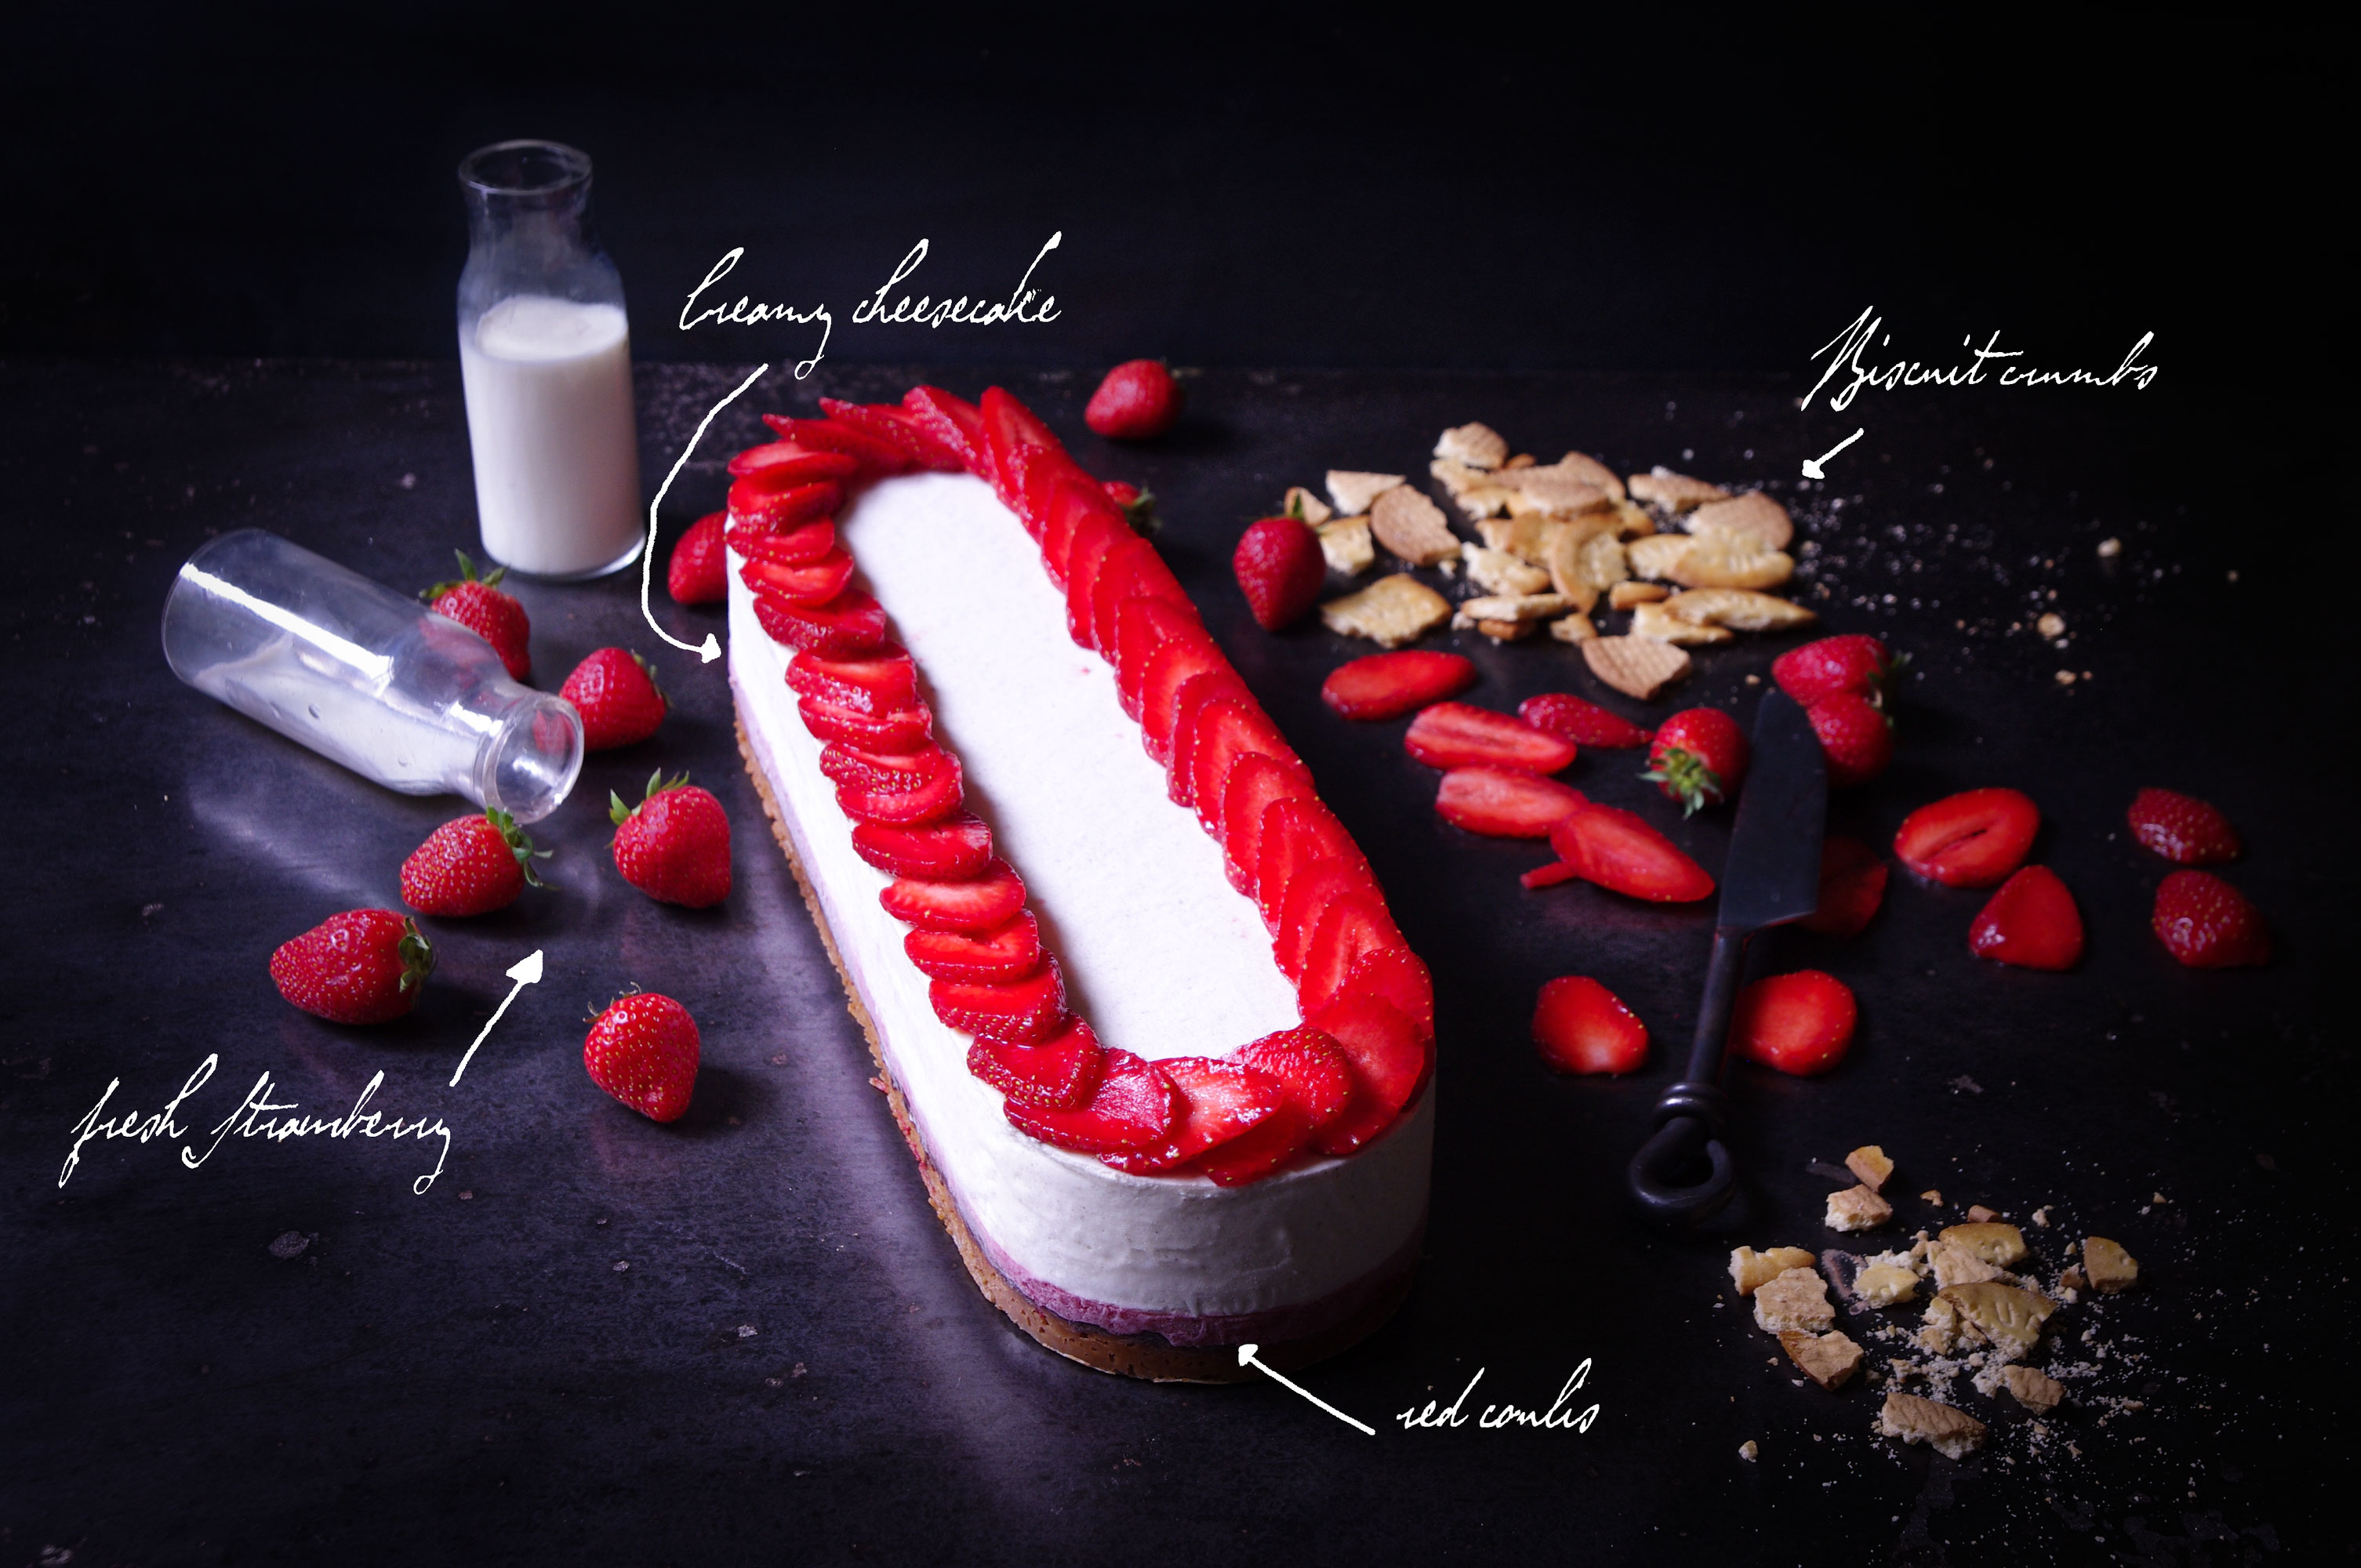
Moreover, it has the advantage of melting in the mouth and at the same time, it lets us use all these nice strawberries flourishing in the markets.
All this for a fresh and fruity result where the crumbly texture of the crust combines perfectly with the sour flavor of the red berries and the sweetness of the cheese.
All right, I’ll stop making you drool…see for yourselves…
INGREDIENTS :
shortbread crust :
- 300g shortbread cookies (or any kind of typical substitute like graham crackers)
- 100g butter
jellified raspberry coulis:
- 350g raspberry juice
- 100g sugar
- 9g powdered gelatin
- 54g water
No-bake cream cheese filling:
- 400g Philadelphia cream cheese
- 200g white cheese with 20% fat
- 300g whole liquid cream (not low-fat)
- 150g sugar
- 10g powdered gelatin
- 60g water
- 1 level tspn powdered vanilla bean
chocolate fondue:
- 100g dark chocolate
- 100g cocoa butter
RECIPE:
Start with the British shortbread.
- Preheat the oven to 180°C (350 °F)
- Put the cookies in a blender and reduce to powder.
- Melt the butter in the microwave.
- Mix the butter and the crushed cookies.
- Put greaseproof paper on a cookie sheet, place the pastry ring on the greaseproof paper, then pour the cookie and butter mixture inside and press well with your hands.
- Cook for about 12 min.
- When the crust has cooled down, melt the 100g dark chocolate with the 100g cocoa butter in the microwave and brush the crust with it.
- Wait for the chocolate to harden.
Prepare the jellified raspberry coulis
- Pour the powdered gelatin in the 60g water and stir well with a spoon.
- Either use already-made raspberry pulp or else push the raspberries through a strainer with the back of a spoon to get rid of their seeds.
- Heat the pulp with the sugar for a few seconds, enough time for the sugar to melt.
- Melt the gelatin in the microwave and pour it on the raspberry coulis.
- Mix everything in an immersion blender and then in the strainer.
- Pour on the crust, covered with a thin layer of hardened chocolate and set aside in the fridge.
Now make the cream cheese filling
- Pour the gelatin in the water, stir with a spoon and set aside.
- Whisk the cream cheese in the blender to soften it.
- Add the white cheese and continue whisking at medium speed.
- Pour in the sugar and the powdered vanilla and continue mixing for 2 min.
- Melt the gelatin mixture in the microwave, then incorporate it.
- Finally, whip the cream until it becomes foamy but not too firm.
- Incorporate it gently into the cheese mixture.
- Pour this preparation on the jellified coulis (the coulis needs to be a bit stiff)
Decoration
Clean the strawberries well, hull them and cut them in slivers and place them on top of the cake
TIPS:
- To properly whip the whipped cream, it and the bowl and whisk that you use to whip it must be very cold.
- There are ready-made red berry coulis; you can easily use them by adding just the gelatin part.
- If you do not find powdered vanilla, you can substitute vanilla flavored white cheese ; it will do.
- The chocolate/cocoa butter mixture acts as a barrier between the cookie crust and the fruit coulis.
- This way, the crust stays nice and crunchy…

Wow!!! It look amazing can’t wait to try it!!
Thank you for the step by step information!!
my pleasure